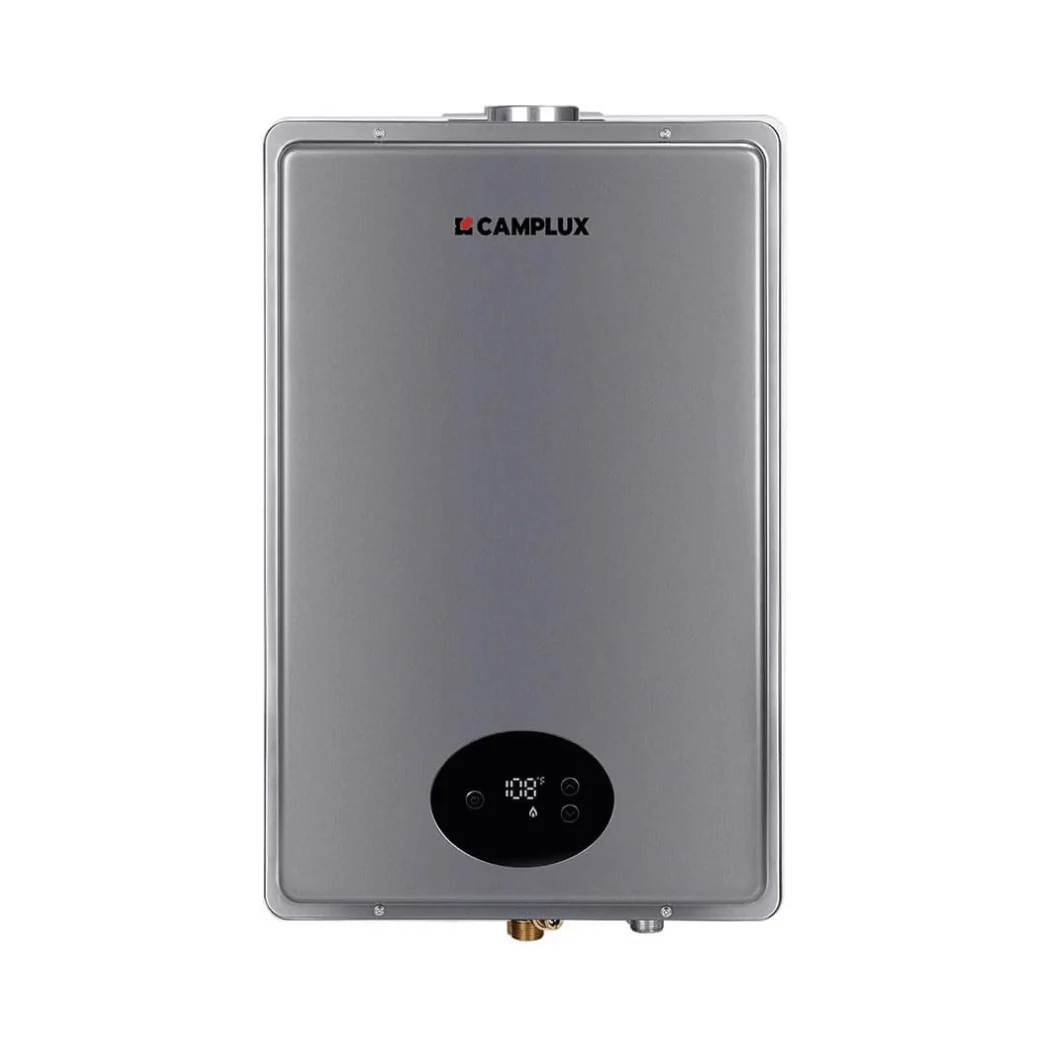
Camplux Drop-In 2 Burner Propane RV Stove
Camplux Drop-In 2 Burner Propane RV Stove
Description
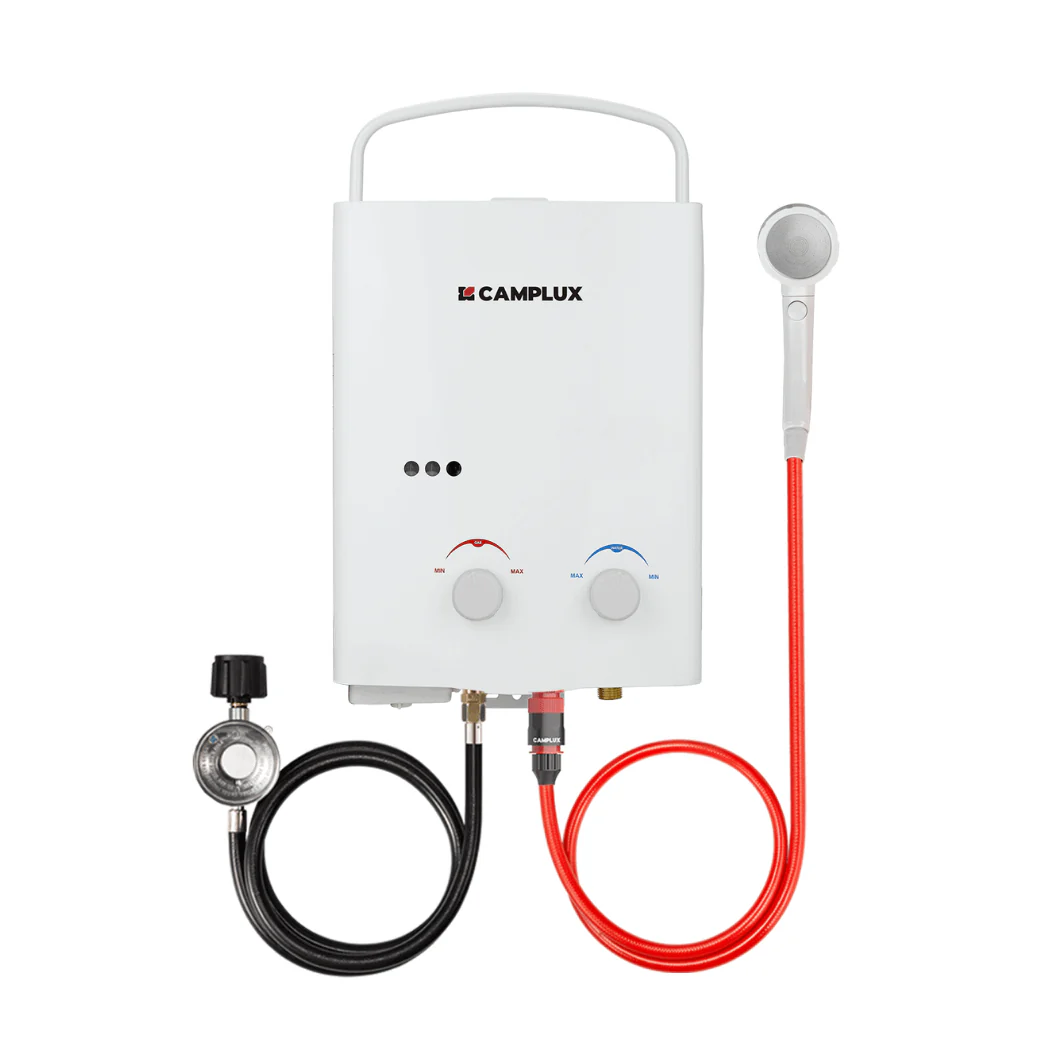
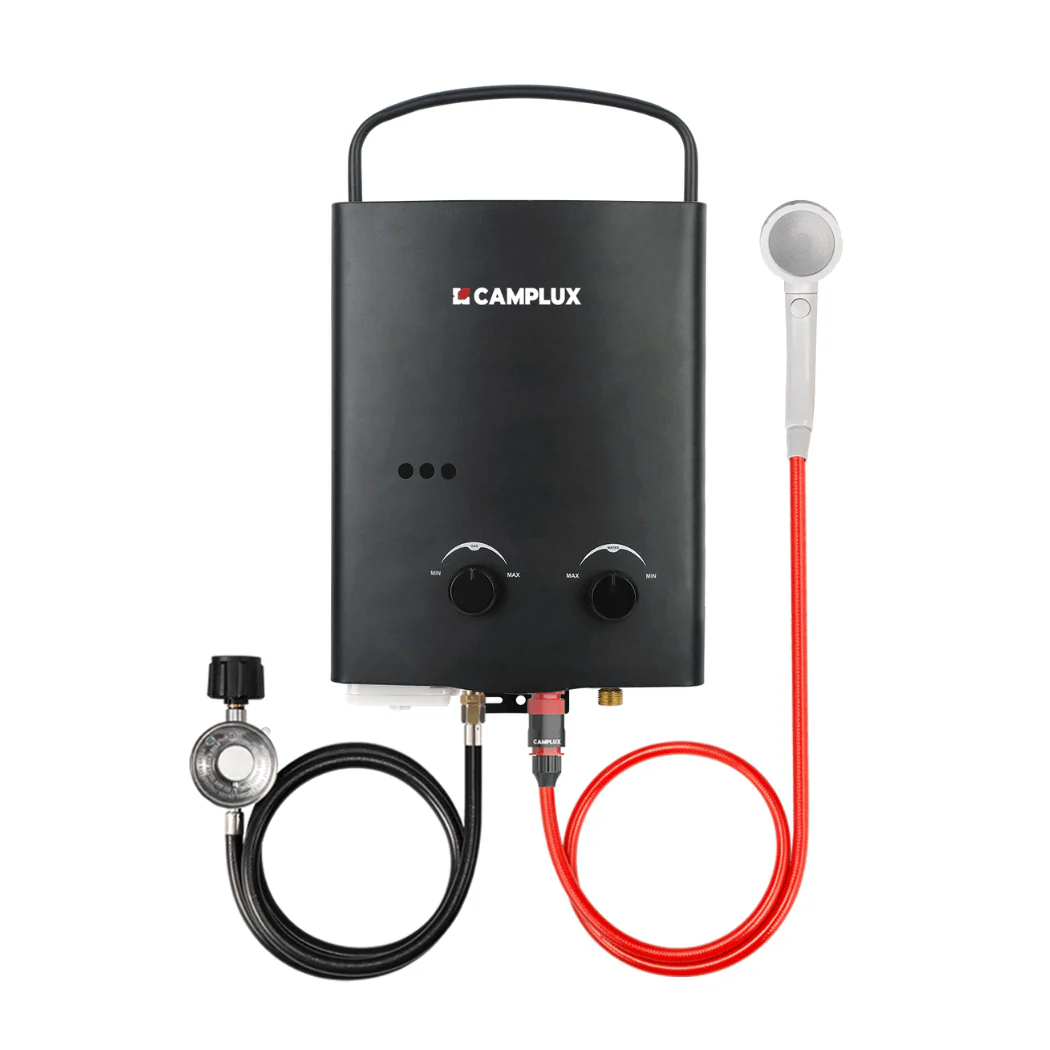
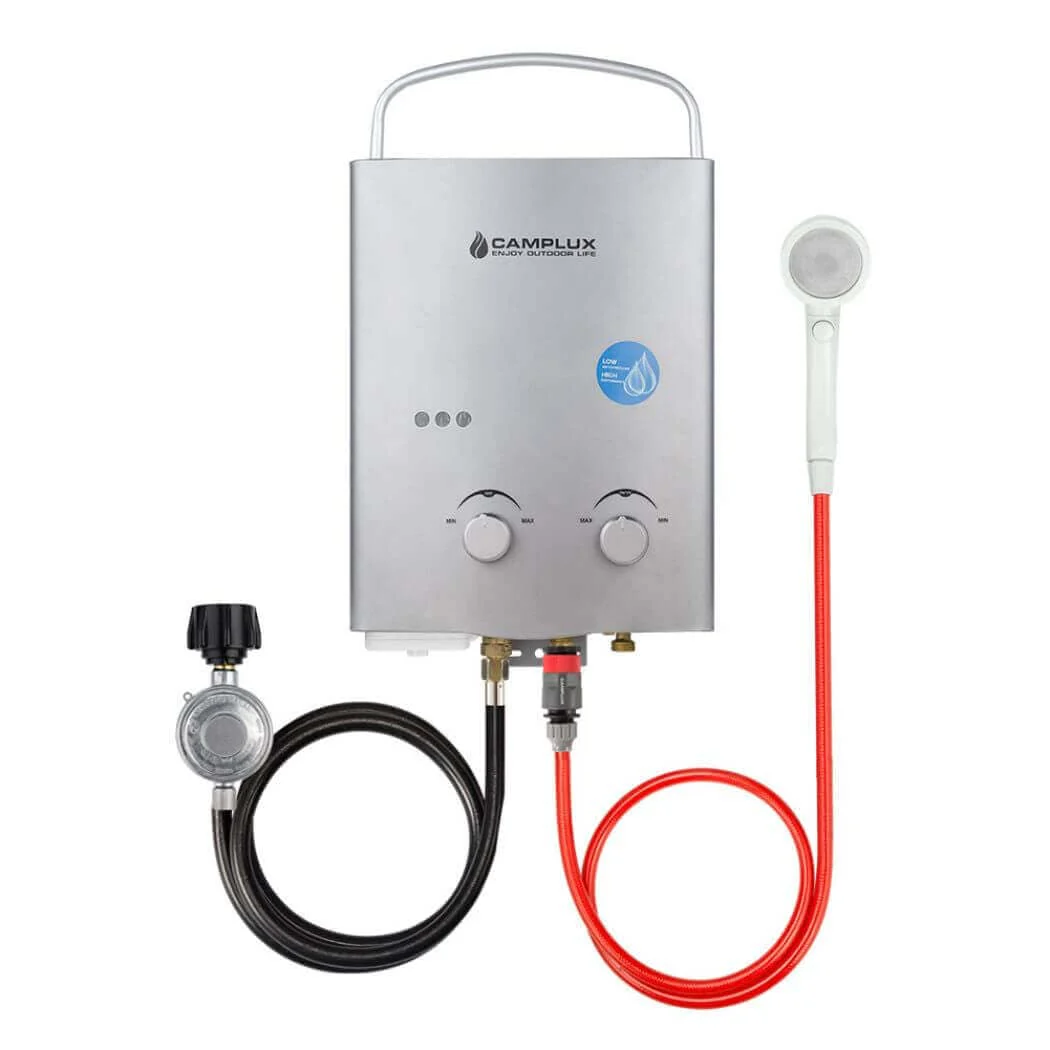
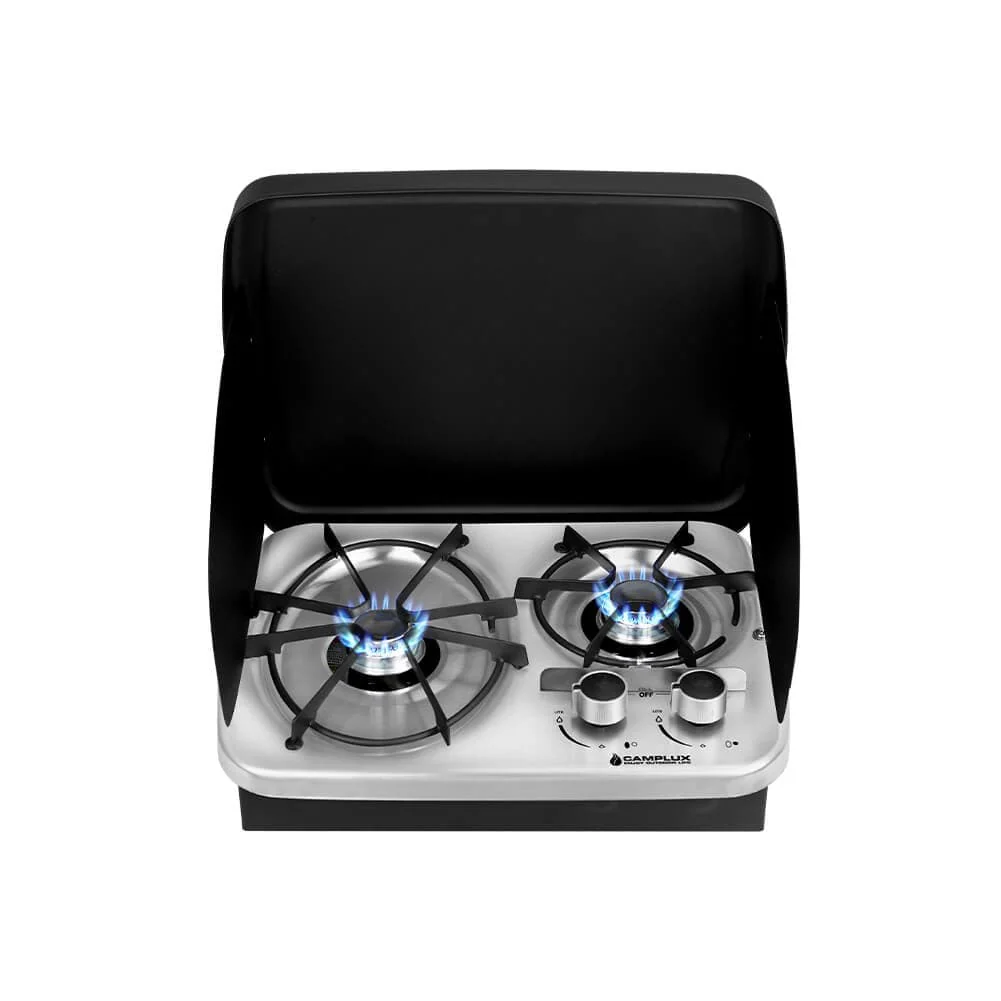
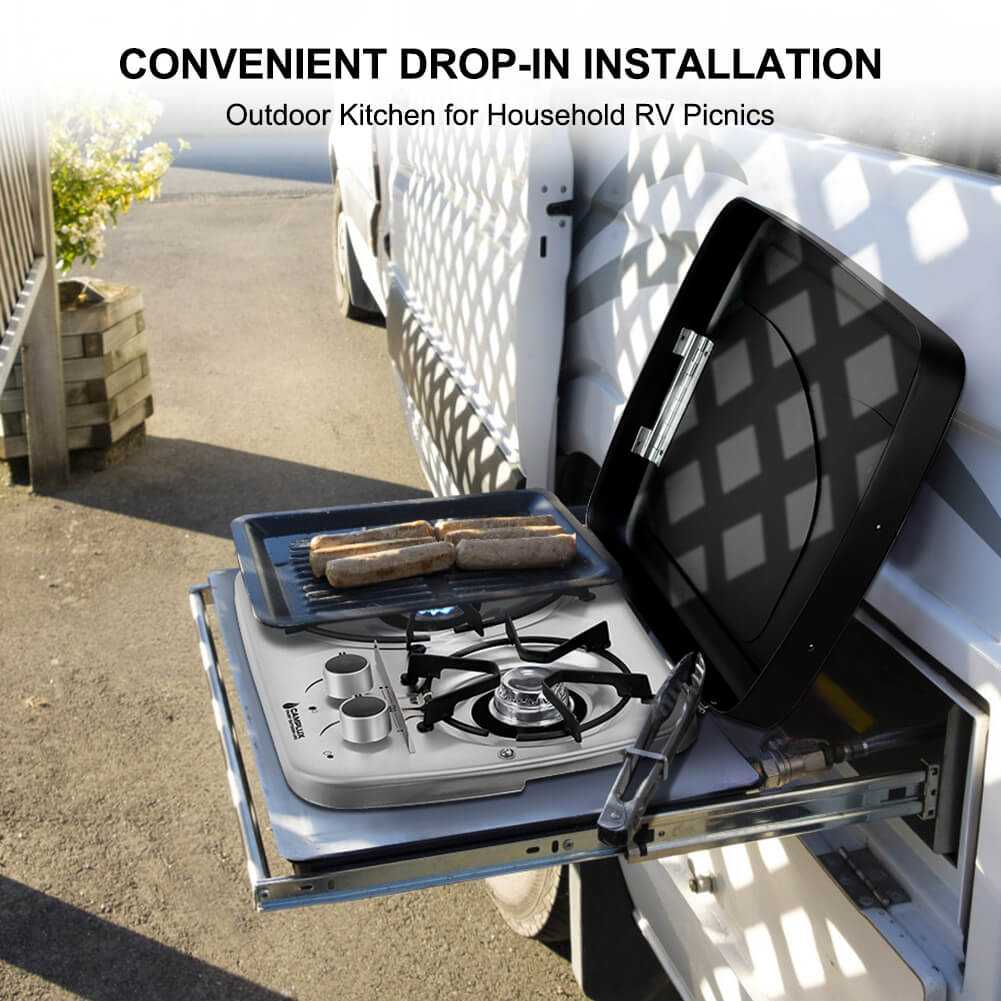
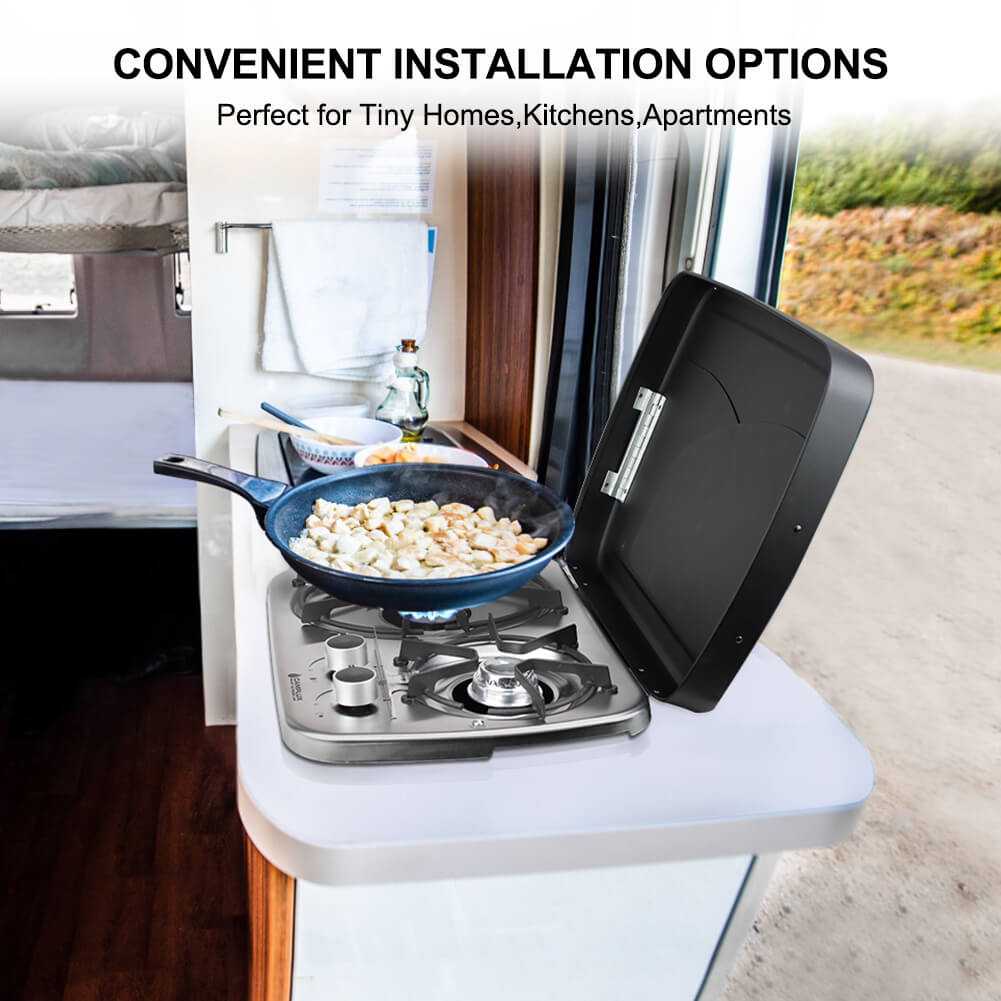
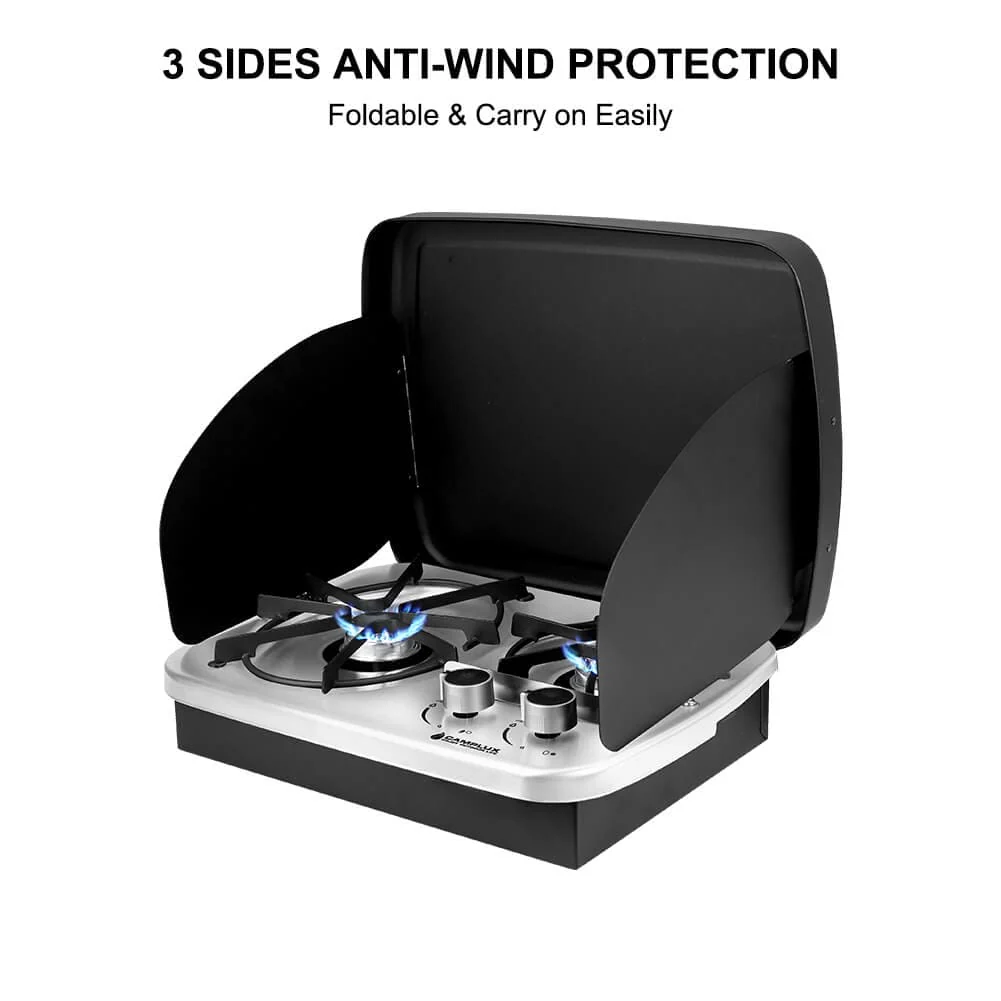
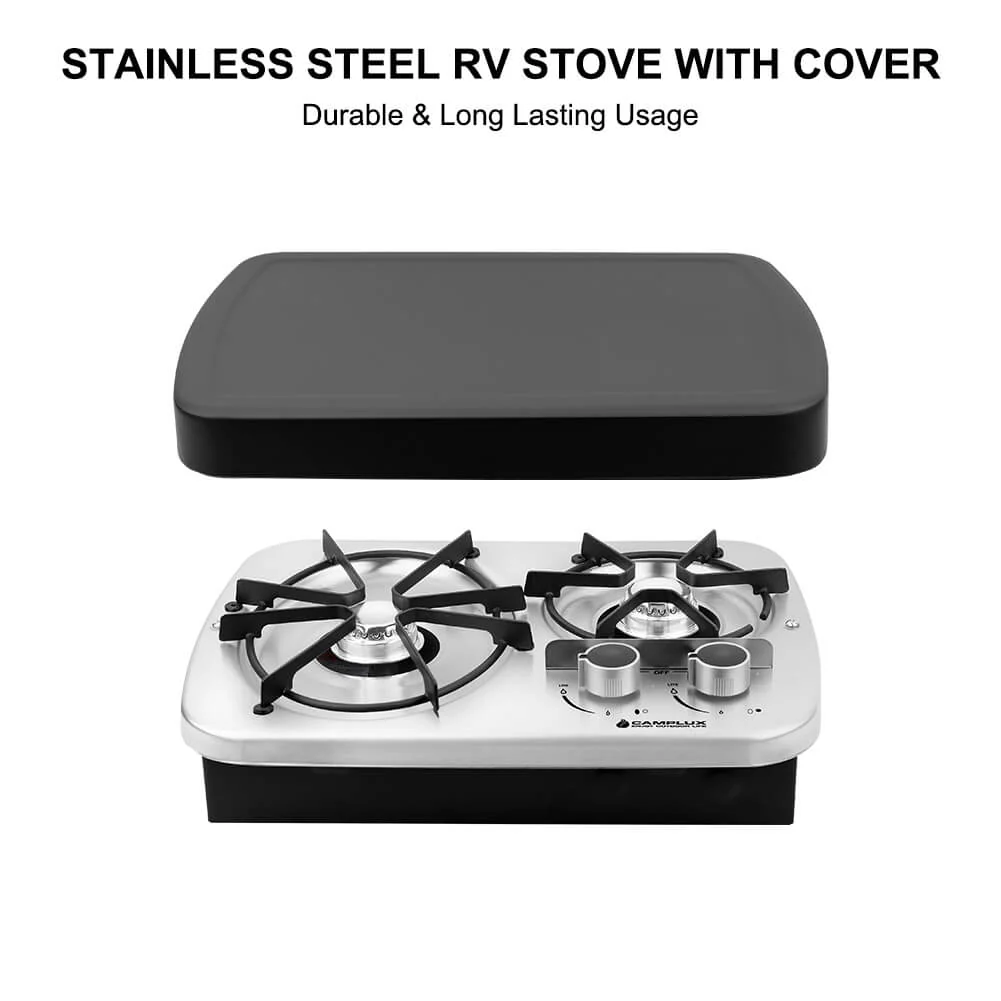
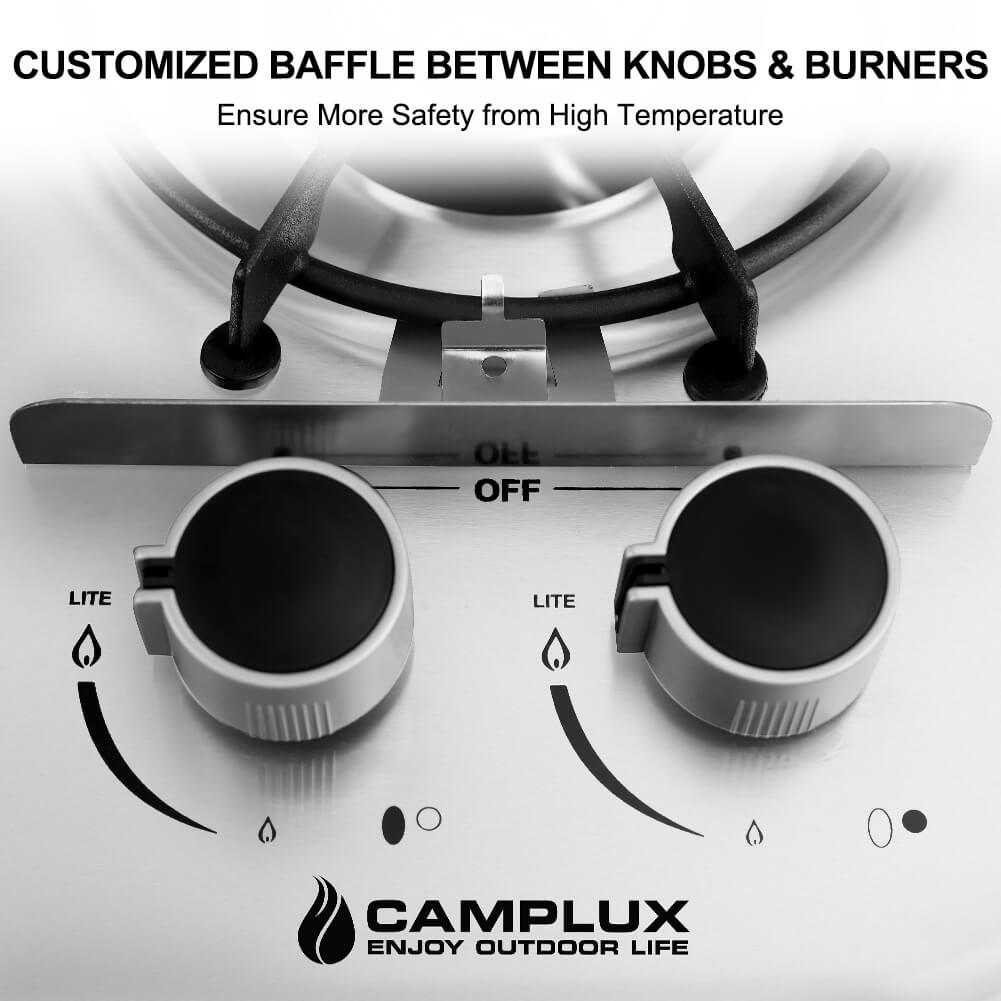
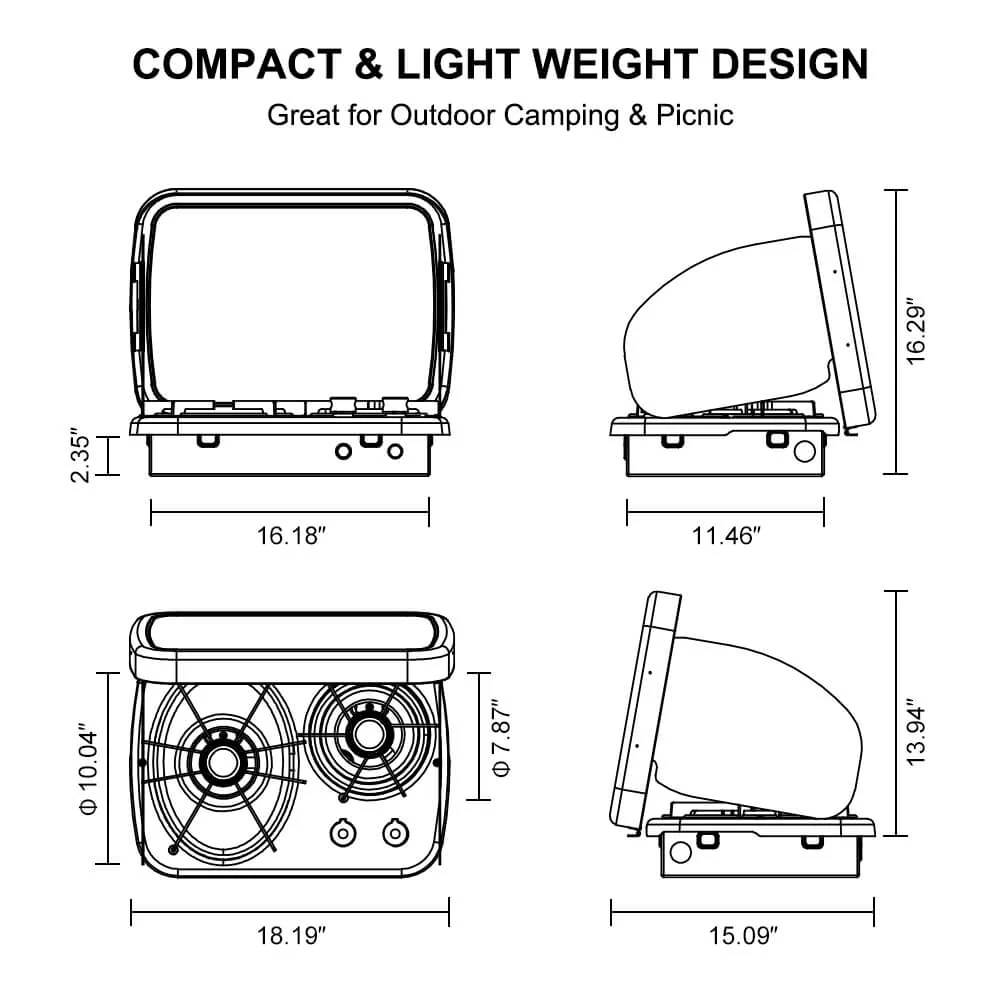
- Compact & Light Weight Design-This lightweight built-in gas cooktop stove eliminates concerns of weight and space restrictions. Great for outdoor kitchen, RVs, campings and outdoor picnic. 3 sides anti-wind protection keep flame from going out during cooking and foldable cover fits securely for easy storage and carry on. The burners and knobs are separated by a small baffle to prevent the control knobs from high temperature.
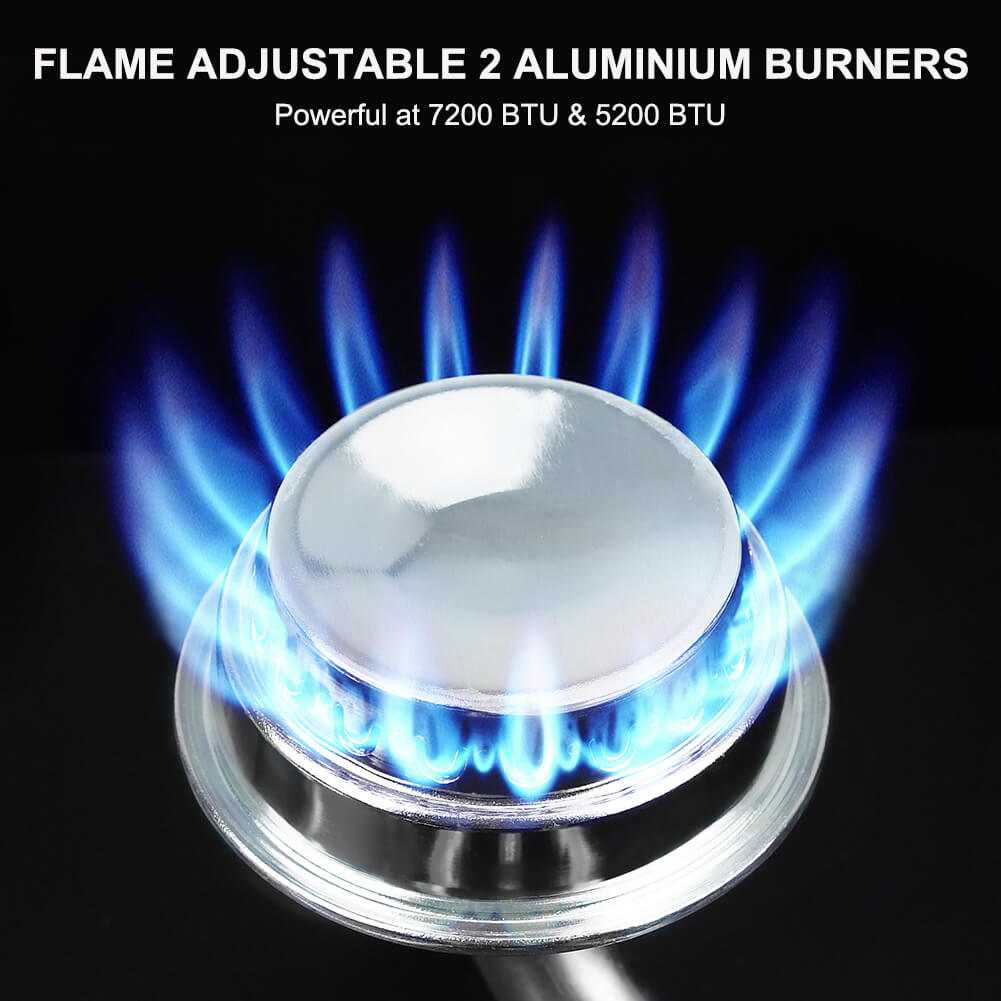
- Powerful BTU For Easier Cooking-Oval grate burner feature 7,200 BTU(diameter 10.04"/255mm), round grate burner feature 5,200 BTU(diameter 7.87"/200mm) for powerful cooking. You can use pots less than 7"/180mm diameter. Adjustable flame control with convenient knobs adjust to desired flame size for easy cooking wherever you go.
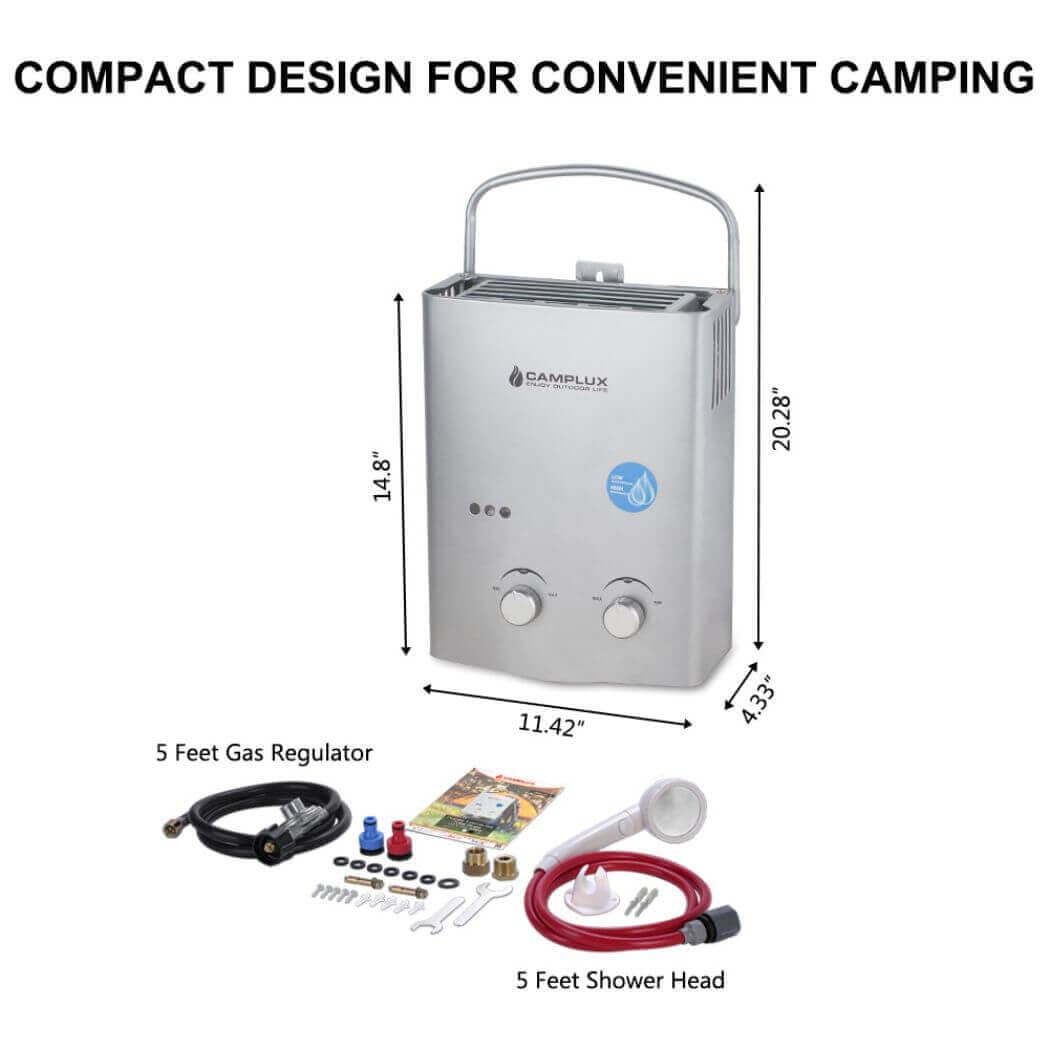
- Stove Cooktop Dimensions & Specifications -18. 19" x 14.17" x 5.04" fits counter cut out 16.18" x 11.56", product weight 13.56 lbs. PLEASE NOTE - This drop-in cooktop are intended to be used
Product Specifications
Camplux Drop-In 2 Burner Propane RV Stove Product Specifications
Fuel Type: Liquefied Petroleum Gas
Material: Stainless Steel
Power Source: Gas Powered
Maximum Energy Output: 7200/5200 British Thermal Units
Item Weight: 13.45 Pounds
Product Manual
Camplux Propane RV Stove Manual(RV201S/RV202S)
Product Warranty
N/A
Product FAQs
Camplux Stove FAQs
How to replace and clean components inside?
Burner
First, pull out the wires of ignition needle and sensor needle. Second, unscrew and take off the flame shield. Third, unscrew the part connecting the burner and gas water valve, burner and inner shell and clean out the dust. Before putting back the panel, ensure that all parts are connected, especially the O-ring seal. For your safety, please use soapy water test on connection between burner and gas water valve, then operate the machine on lowest flame and highest flame. This will help you check for gas leak.
Thermostat
Pull out the wires on the thermostat, and unscrew the thermostat. The new thermostat should be good contact with the inner shell and remember to insert the wires back on it.
Gas Water Valve
Unscrew the gas water valve with a wrench and a phillips screwdriver;
Then unscrew the ground wire and disconnect all the terminals between ignition box and other parts. Before putting back the panel, please ensure that all parts are connected, especially the ground wire. For your safety, please use soapy water test on connection between burner and gas water valve, then operate the machine on lowest flame and highest flame. This will help you check the gas leak.
Clean the heating plate on the heat exchanger. When the exchanger is no longer working, it needs replacement. Before you cover the panel, use soapy water test for gas leakage.
Ignition Box
First, pull out the wires of ignition needle and sensor needle. Then unscrew the ground wire and disconnect all the terminals between ignition box and other parts. Last, unscrew the ignition box. After replacement, remember the ground wire must to be connected back.
Original: $109.00
-65%$109.00
$38.15Product Information
Product Information
Shipping & Returns
Shipping & Returns
Description
Camplux Drop-In 2 Burner Propane RV Stove
Description
- Compact & Light Weight Design-This lightweight built-in gas cooktop stove eliminates concerns of weight and space restrictions. Great for outdoor kitchen, RVs, campings and outdoor picnic. 3 sides anti-wind protection keep flame from going out during cooking and foldable cover fits securely for easy storage and carry on. The burners and knobs are separated by a small baffle to prevent the control knobs from high temperature.
- Powerful BTU For Easier Cooking-Oval grate burner feature 7,200 BTU(diameter 10.04"/255mm), round grate burner feature 5,200 BTU(diameter 7.87"/200mm) for powerful cooking. You can use pots less than 7"/180mm diameter. Adjustable flame control with convenient knobs adjust to desired flame size for easy cooking wherever you go.
- Stove Cooktop Dimensions & Specifications -18. 19" x 14.17" x 5.04" fits counter cut out 16.18" x 11.56", product weight 13.56 lbs. PLEASE NOTE - This drop-in cooktop are intended to be used
Product Specifications
Camplux Drop-In 2 Burner Propane RV Stove Product Specifications
Fuel Type: Liquefied Petroleum Gas
Material: Stainless Steel
Power Source: Gas Powered
Maximum Energy Output: 7200/5200 British Thermal Units
Item Weight: 13.45 Pounds
Product Manual
Camplux Propane RV Stove Manual(RV201S/RV202S)
Product Warranty
N/A
Product FAQs
Camplux Stove FAQs
How to replace and clean components inside?
Burner
First, pull out the wires of ignition needle and sensor needle. Second, unscrew and take off the flame shield. Third, unscrew the part connecting the burner and gas water valve, burner and inner shell and clean out the dust. Before putting back the panel, ensure that all parts are connected, especially the O-ring seal. For your safety, please use soapy water test on connection between burner and gas water valve, then operate the machine on lowest flame and highest flame. This will help you check for gas leak.
Thermostat
Pull out the wires on the thermostat, and unscrew the thermostat. The new thermostat should be good contact with the inner shell and remember to insert the wires back on it.
Gas Water Valve
Unscrew the gas water valve with a wrench and a phillips screwdriver;
Then unscrew the ground wire and disconnect all the terminals between ignition box and other parts. Before putting back the panel, please ensure that all parts are connected, especially the ground wire. For your safety, please use soapy water test on connection between burner and gas water valve, then operate the machine on lowest flame and highest flame. This will help you check the gas leak.
Clean the heating plate on the heat exchanger. When the exchanger is no longer working, it needs replacement. Before you cover the panel, use soapy water test for gas leakage.
Ignition Box
First, pull out the wires of ignition needle and sensor needle. Then unscrew the ground wire and disconnect all the terminals between ignition box and other parts. Last, unscrew the ignition box. After replacement, remember the ground wire must to be connected back.